If you aren't familiar with bottling cold brew, this article will take you through the ins and outs you need to know. More importantly, though, we will look at why and how to pasteurize your bottled cold brew.
You may want to do this so you can take it to work or on picnics, or you may want to share it with your friends or sell it. No matter which, we will send you on the right path.
So, You Want to Bottle Cold Brew Coffee?
It's surprisingly easy to make and bottle cold brew. First, you have to make your cold brew using your favorite ground coffee and one of several brewing methods. Then, you only need simple items like a funnel, some bottles, a strainer or sieve, and some free time.
Then, you'll need to think about how long you want to keep your cold brew before someone consumes it.
That process is a little more complex and considered advanced if you commercialize bottling your cold brew.
If you have never brewed cold brew coffee before, I invite you to look at one of our helpful guides, which outlines the process for you. Once you are comfortable making cold brew concentrate, you are ready to bottle.
Let's start by covering some basic ideas you'll need to think about before you bottle cold brew coffee for the first time.
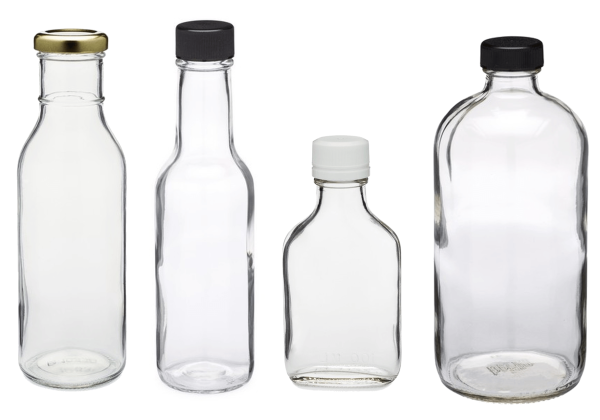
Recycle Store-bought Cold Brew Coffee
If you are anything like me, you like to hold onto your store-bought cold brew and iced coffee bottles that you'll find in the ready-to-drink refrigerator section. So gather a few of these for the next time you wish to bottle cold brew and fill them up with your batch.
You'll save room in the fridge and free up that large carafe or pitcher you used during the brewing process.
Given you plan to store your cold brew in the fridge, it's best to drink or share your coffee within a week to 2 weeks to keep the flavor delicious enough to share.
You may be wondering what the best vessels are to store your coffee in after the French Press or other brewing device.
Let's take a look at the most common choices out there for storing your cold-brewed coffee.
When to Store Cold Brew Coffee in Plastic Bottles:
Suppose your desired outcome is to store your cold brew within a familiar vessel. Once used for previous batches, plastic bottles are great for short-term storage. I'll sometimes use recently-emptied plastic soda bottles when I run out of glass.
When I choose to store in plastic containers, I won't share them with others, especially older bottles, because you never really know how clean they are.
However, using plastic bottles for your personal use is a great way to recycle and prevent wasting plastic unnecessarily. Plus, they are cheaper coffee vessels to acquire.
When to use Glass Bottles for Storing Cold Brew Coffee:
Assuming you buy a lot of cold brews from the ready-to-drink section of your favorite grocery store, you'll notice most of these are glass bottles.
The great thing about bottling with glass is that the glass does not contain BPA or other synthetic chemicals. However, with some plastics, these chemicals may transfer to your coffee through heat, exposure to sunlight, or time.
So, if you plan to share your coffee brew with a friend, sell it at a market, or pasteurize it, always go for a glass bottle.
Pasteurizing Your Cold Brew Coffee with a Sous Vide
Suppose you wish to share it with friends, keep it for longer than the typical 2-weeks shelf life, or potentially sell your cold brew creation. Then, you'll want to consider pasteurizing it as the last part of the bottling process.
Why Pasteurize Cold Brew Coffee?
There is a tendency for unwanted mold growth in anything that sits out for a while. Since nobody wants to get sick from these microbes, we can preserve our cold brew coffee after the brewing process.
By sealing the environment and adding a preservative or heat treatment to kill off anything that could grow inside, none will.
You might also want to add in milk, sugar, spices, or other related coffee additives that make your drink special. Unfortunately, your cold brew's shelf-life decreases substantially as soon as you combine these ingredients.
Why You Shouldn't Pasteurize Your Cold Brew
Suppose you are like me and brew your batches as needed for the week. In this instance, it makes little sense to go through the trouble of pasteurizing.
However, there are downsides to pasteurizing that cold brew groups often talk about.
I've often found that the pasteurized cold brew lacks a depth of flavor that I can taste immediately compared with a fresh cup brewed within hours.
How to Pasteurize Cold Brew Coffee with a Sous Vide
Now that you understand why you may or may not want to take this step, let's cover how to pasteurize your cold brew coffee with heat from a sous-vide wand.
Note: This is a budget option and is not how the industry typically does it.
You'll likely have weird results if you attempt to pasteurize your cold brew with any additives that are sensitive to heat. That said, you should be able to pasteurize your brew black with a minor taste affect.
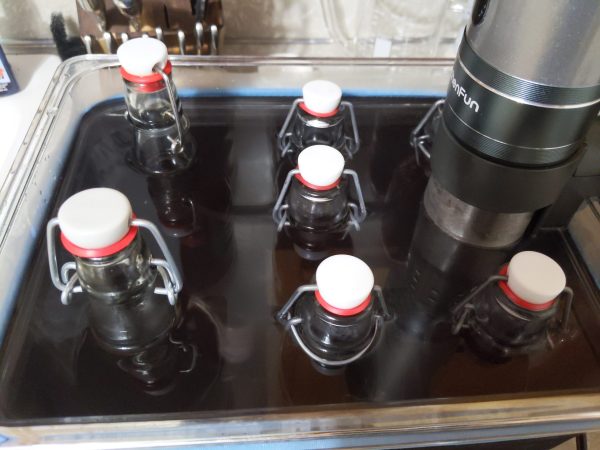
Step 1: Gather your Materials:
- Your cold brew batch in its brewing container
- Enough glass bottles to evenly transfer your batch (16 & 32 oz. works great)
- One glass beer bottle
- A funnel
- A fine mesh filter
- A large mixing bowl
- Star Sans or Comparable Brand Sanitizer
- Large pipe cleaner brush
- Large plastic container (like what you take to a picnic) or a sous vide container
- Portable sous vide wand (for heating water)
- Dowel rod or kitchen utensil to hold the sous vide upright
- A meat thermometer
Step 2: Sanitize Everything
Once you have everything from the material list above, you'll need to make sure you sanitize everything using the sanitizer (following the instructions from the one you choose).
Next, use the large mixing bowl to mix the appropriate sanitizer solution with water. Then, place all the materials in the sanitizing solution.
Note: Keep in mind that every surface you touch will have microbes on it.
Make sure you rinse your hands with this solution periodically. Each item you work with any time that item touches something that is not sanitized.
This can be a bit of a pain to do, but imagine that everything you are working with has wet paint on it, which will force you to pay closer attention.
Step 3: Using the funnel, slowly pour your cold brew into the glass bottles
Leave some air between the top of the bottle and the bottle's shoulder. Make sure all bottles have an even amount of coffee.
Be careful not to add in any sediment that remains at the bottom of your brewing jar. Leave one taller bottle empty, as we will use this one to hold the thermometer to gauge how hot the interiors of the other bottles are while pasteurizing.
Step 4: Seal Your Glass Bottles
Depending on which type of glass bottle design you are working with, you can either twist a cap on, press a metal cap (with a bottler device), or flip down the cap (Grolsch-style and milk bottles).

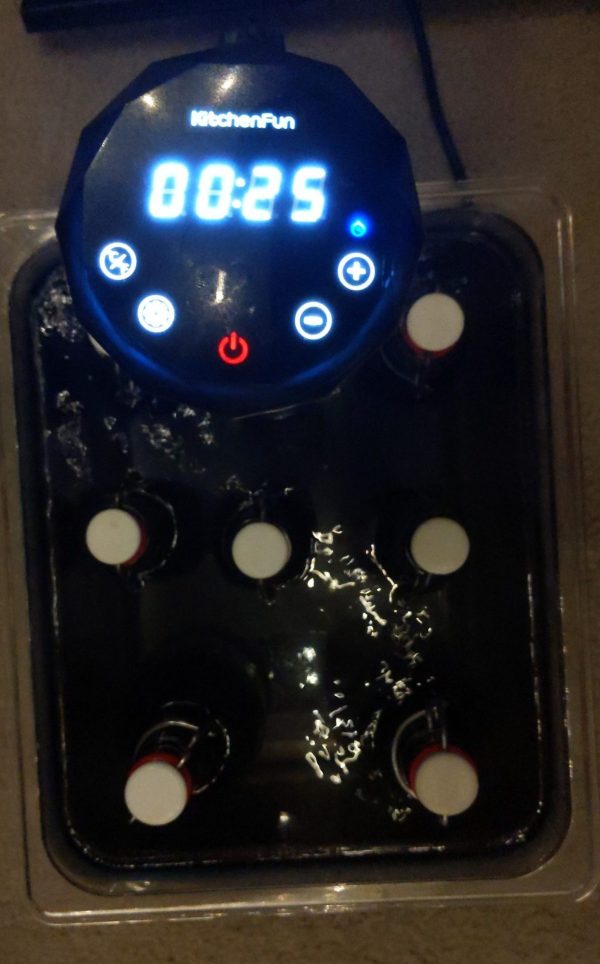
Step 5: Place Your Bottles standing up in the Container.
Place each bottle standing up within the cooler. If you have too many bottles for the cooler, consider getting a larger one. Alternatively, repeat the process for the remaining bottles after finishing with these.
Fill your beer bottle up with water to the top and place the thermometer inside it. Place that bottle in the center of the cooler, with the smaller sealed bottles surrounding it.
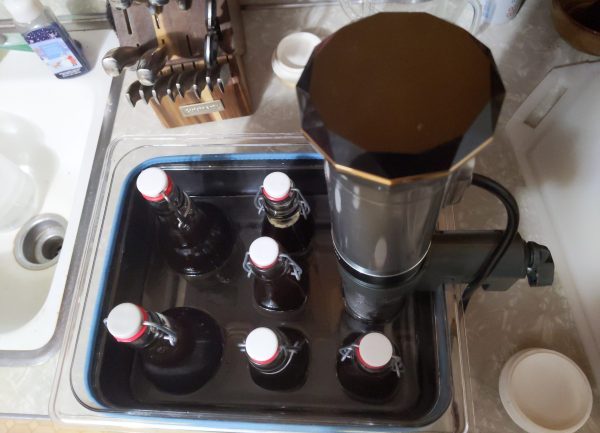
Step 6: Begin Adding Tap Water to the Container
Fill it up until the water completely covers the top of all the glass cold brew bottles but not so deep that the beer bottle is submerged. Then, fill the beer bottle to the bath's height.
Step 7: Arrange your sous vide to submerge the heating element.
Some sous vide wands will come with stands you can place inside your vessel, while others have a hook that you can attach to a dowel rod or hanger of some kind. The point is you'll want the sous-vide heating elements safely submerged for the next step.
Alternatively, you can use a kettle, but the process takes much longer. You may also find it harder to maintain the temperatures you need to perform pasteurization properly.
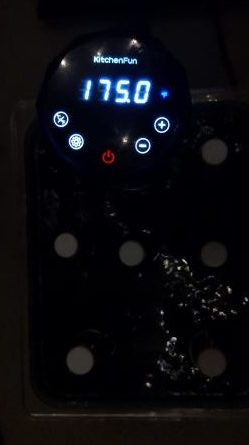
Step 8: Set the Sous Vide Temperature to 175 degrees Fahrenheit
Using the built-in controls of the sous vide, set the temperature to 175 degrees Fahrenheit and allow the water to reach this temperature before setting a 25-minute timer.
The idea is that you want the water to slowly come up to and maintain a temperature higher than 170 degrees Fahrenheit for 25 minutes.
Then you'll allow the temperature to settle back to lukewarm before handling.
Note: Increase the temperature too quickly and a bottle might break
Step 9: Wait!
Don't touch anything until the temperature cools down. Once your drinks are at room temperature, you don't have to worry about storing them in the fridge.
However, I still do because I'm not too fond of lukewarm coffee in the morning.
FINAL THOUGHTS
Cold brew has long been popular in Japan. However, it has recently become trendy in Western countries, especially North America. Coffee drinkers with a sensitive stomach can enjoy cold brew coffee as it is much less acidic than standard coffee or iced coffee.
To make your coffee more unique and personalized to your taste, you can add milk substitutes, sugar, coffee creamers, cream, and syrups.
That said, if you do not pasteurize your cold brew, there is a chance that bacteria, yeast, or mold could cause food-borne illnesses. So please do your due diligence related to the pasteurization process to avoid this from happening.
Remember never to use plastic that isn't rated for pasteurization; always filter your concentrate before bottling your cold brew, and share it with your friends and family.

Neat! This was a really wonderful post. Thank you for supplying this info.
Hi! After pasteurizing, how long will the shelf life be?
The shelf life of heat pasteurization for your cold brew will be anywhere from 3 to 6 months if not kept in the fridge. I’ve never had pasteurized cold brew long enough to tell how long it would last in the fridge post-pasteurization. There are more factors to consider too, like whether or not your bottles were first sanitized, if they are stored in a dark place or in direct sunlight, for example. I will conduct more experiments to find out, but I can say that older age does alter the flavor of your coffee.
Great article. You mention adding milk/cream/sugar to the cold brew. My question is: can you add those before pasteurizing to get extended shelf life? Thanks
Hi there Clint! I definitely would not add milk or cream to your cold brew prior to pasteurizing using this makeshift method. I think you would need to go with preservatives to prevent curdling or foul taste.